
How to optimize your Unity mobile game performance in four easy steps
Having studied many prototypes, I’ve hardly come across a single one that has been optimized for lower-spec devices, even with hyper-casual games. If the game performs consistently well on high-power devices, it doesn’t mean that post-processing, incorrect graphics and shadow settings won’t destroy the frame rate in a couple of clicks, and these errors are critical on release.
That’s why I try to give developers the fastest and most effective solutions without having to redo half the game when I get a new project. Today we’re going to talk about some of the most common and simple issues in optimization that can be fixed with minimal resources.
This information is especially useful for hyper-casual projects that have short development cycles and are tested on a real audience, but must run smoothly on the widest array of devices.
*****
The obvious reason for optimization problems is the fact that a mobile device GPU is incomparable to a PC graphics card. Flagship GPU can be ten times more powerful than what the popular and cheap devices can offer, and post-processing implies additional operations with the rendered image every frame, 30-60 times per second.
At the same time, mobile games don’t always require high image quality, screen size being one of the reasons. Regardless of that, developers still often use eye-pleasing effects familiar to console and PC users: bloom, color correction, anti-aliasing, and so on.
As a result, the game starts lagging, and you need to figure out why.
Reason #1. Anti-aliasing and the urge to make things look pretty

Anti-aliasing is used to eliminate the “ladder” effect on the edges of objects. It looks nice, and is basically painless to run on above-average devices, but it can seriously ruin the gaming experience on low-spec devices.
Customization for different devices could be the solution, but based on my experience very few hyper-casual developers do this. That’s why removing anti-aliasing completely is easier and faster — the difference might be undetectable on mobile screens anyway.
There are two ways to solve the color correction issue.
- An artist can do it, but redrawing textures requires a lot of resources, so let’s discard this option.
- You can go through all the shaders the project has and insert a couple of lines that do color correction. In this case, color correction is basically “free of charge”. However, if there are too many purchased shaders and the developer doesn’t understand what goes where, some problems may arise.
The trick is that if we want to do color correction, but don’t want to insert it into the shader, we won’t be able to render it on the screen. First, you’ll have to draw the whole game into the internal texture, then do color correction on it, and display it on the screen only after the deal is done. Due to the complexity of this process, the frame rate on low-spec devices immediately drops several times.
There’s another nuance: you can insert color correction into a shader only with a small number of light sources. This isn’t relevant for most mobile games, but I’ll explain it anyway, just in case.
You can’t add miles of code to a shader, as there are limitations. You can write in, let’s say, 10 light sources to be processed in this shader. But if you need more, you’ll have to draw this object again, and then add lighting from new light sources. Because of this step, the color correction in the shader will stop working correctly and it’ll look messed up.
Reason #2. Physics and the urge to make things “honest”
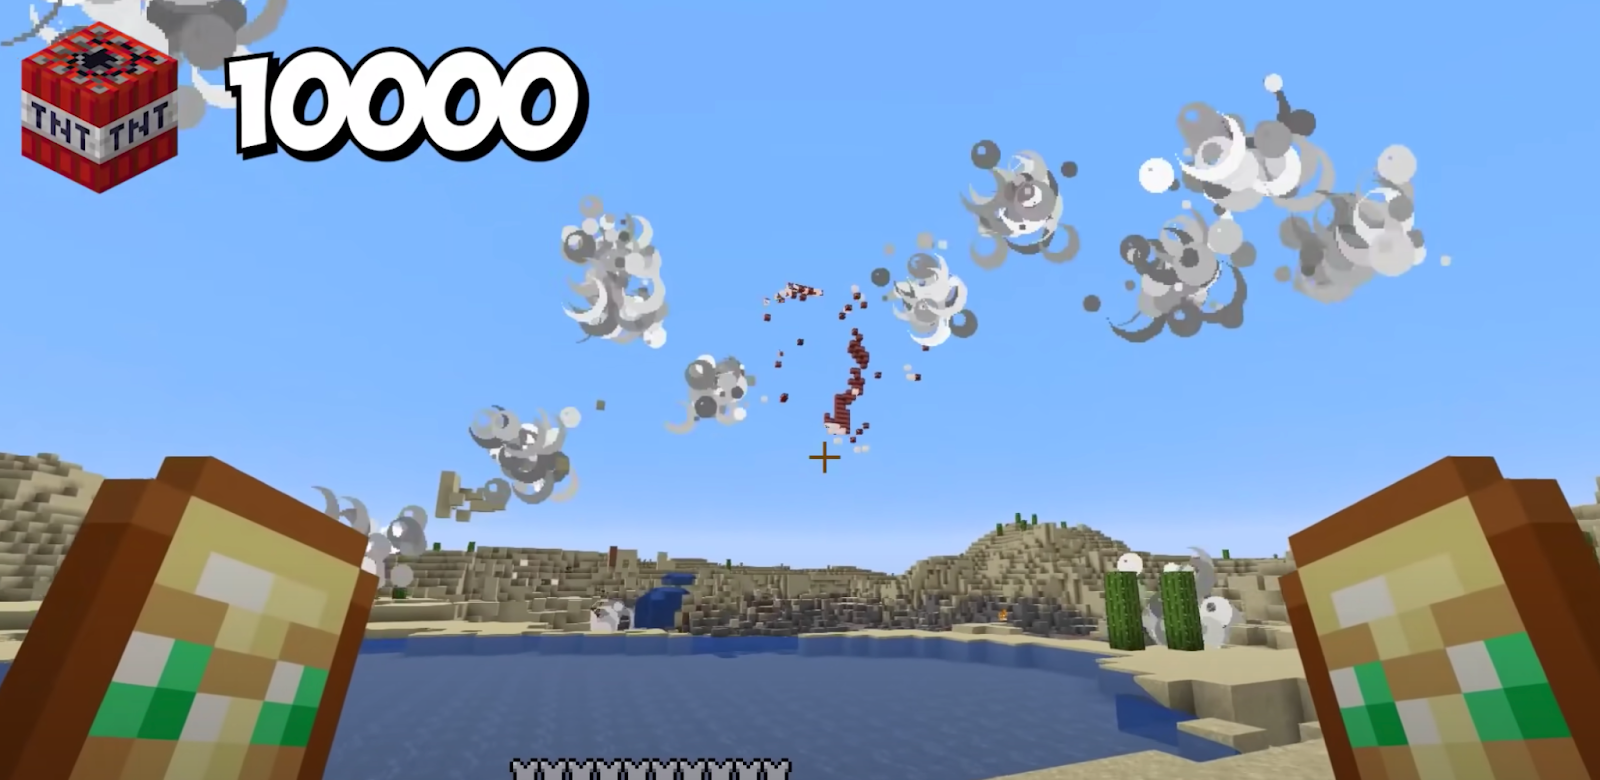
Case: 50 objects explode on the scene at the same time, which overloads the device.
The solution is simple: you don’t have to really blow everything up — you can apply high-quality and well-developed effects closer to the camera, and make a simpler smoke effect or nothing at all for everything else.
Another example from my practice:
There’s a 3D game with a running man who can die in two ways, by being cut vertically with a circular saw or horizontally with spinning knives. To implement this, you can install a hefty plug-in that takes a human mesh while the game is going on, cuts it into several objects correctly, sews up the “hole” that has formed, and applies physics to each part. The process is very slow, even for a PC. But what if the game has 20 people who are simultaneously hit by the knife?
In this case, you can simply make two prefabs: one cut horizontally, the other vertically. Save them, calculate them in advance and use the finished ones in the game.
Reason #3. Large amount of independent objects
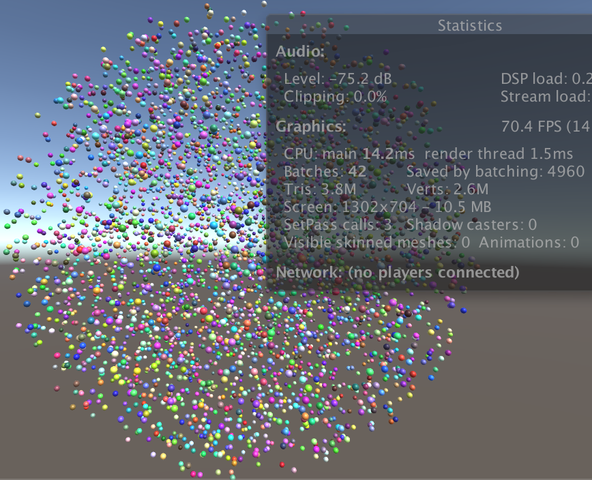
Case: the scene environment consists of different materials with different shaders applied to cubes, or just a large number of cubes. The game starts to lag noticeably when it reaches 10,000 cubes on the scene, since each object requires one draw call on the graphics card.
Batching objects into one large mesh can help with rendering a scene with many identical objects faster. You can do it with Unity tools, but it’s better to do it manually.
At the same time, static batching is worse than batching it into one mesh if you have a lot of low-poly objects on the scene. Unity will render static batching as the same mesh, but piece by piece with a bunch of calls. So, 10,000 cubes will be rendered in 10,000 draw calls.
Solution: use one shader with all the required parameters for materials, make sure that the environment objects are marked as static, and that the project uses batching that groups these objects during rendering and renders them all in one draw call.
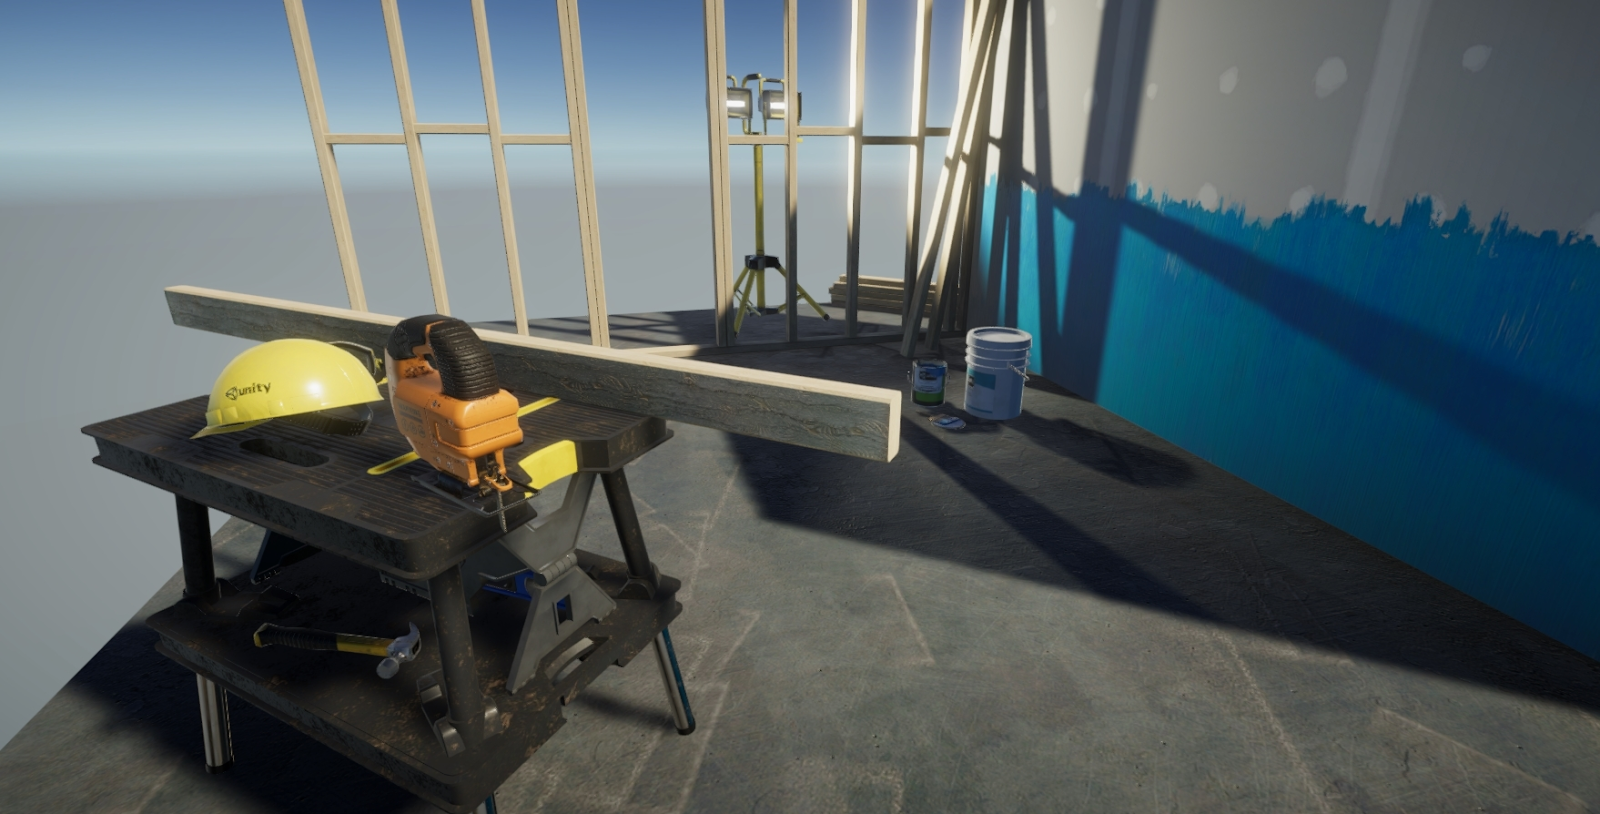
Reason #4. Real-time shadows and lighting
The main reason why you shouldn’t use it: lighting calculations happen while the app is running and overload the device.
Solution: using pre-rendered lightmaps in environment shaders aka bitmaps. The target device that will be running the game will load the lightmap once instead of having to recalculate it all the time during the game.
Fully baked light (max performance):
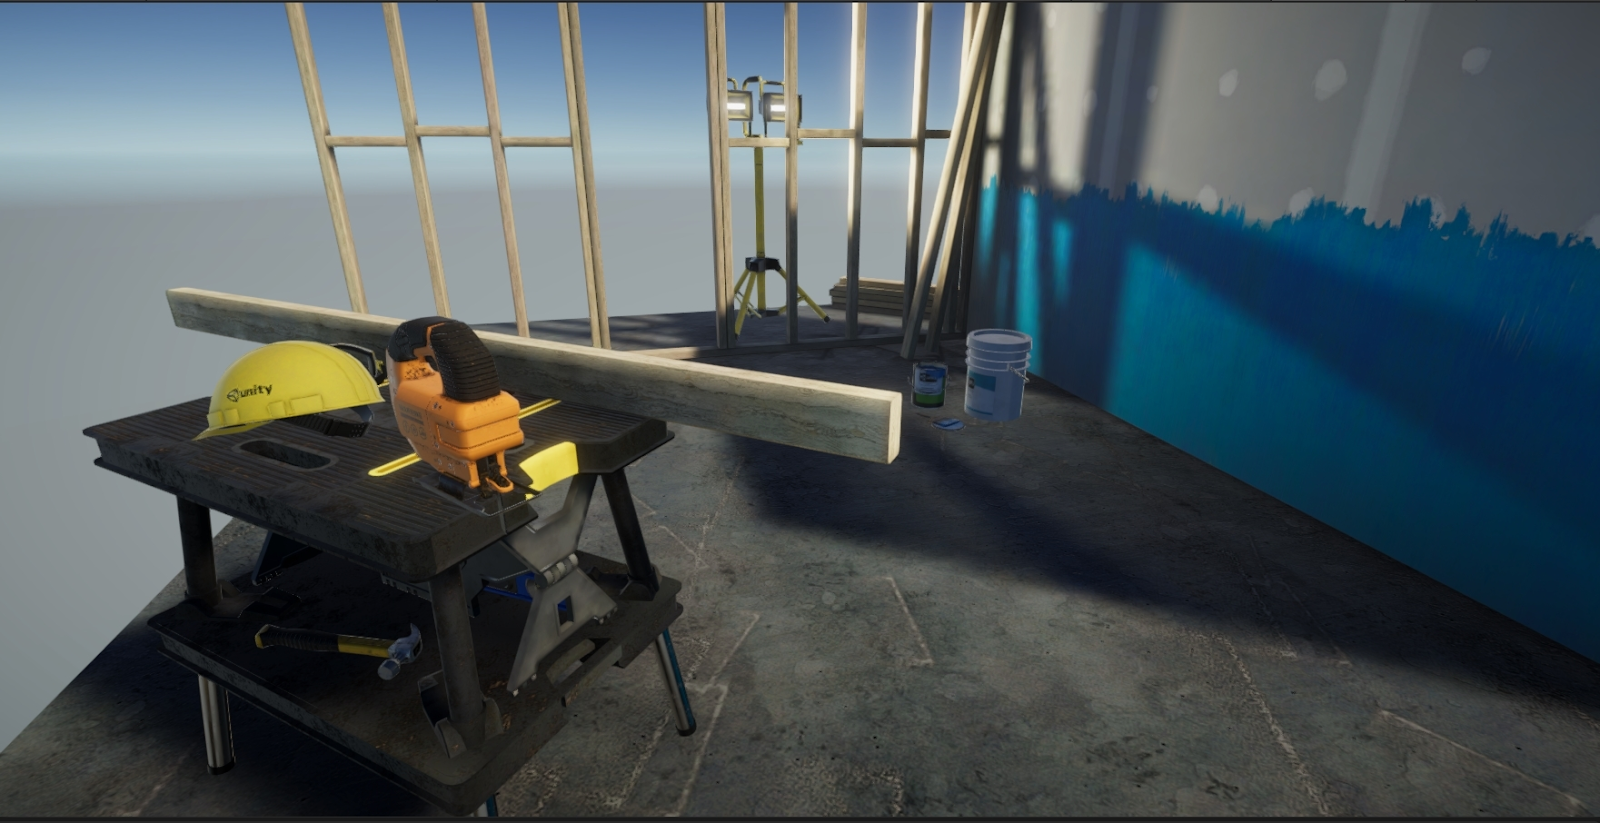
One cascade of shadows without anti-aliasing, adjusted to the scene size (x2 in terms of resources compared to the first option):

Shadows on standard settings with several cascades + anti-aliasing (x2.5 to the first option):
Bonus: tips and tricks
In addition to all of the above, I recommend you to do a few more things to bring your prototype even closer to a successful release.
- Remove Light and Reflection probes from all meshes if you aren’t using them — they take a chunk of performance, even if there are no references to them in the shader.
- The number of iterations for Physics Solver can be reduced from 6 to 2 (but you need to check if this will affect the gameplay), and the physics update frequency from 50 to 10-30 (about 30-50% of the target frame rate). Object positions will be interpolated, so there shouldn’t be any visual stutter.
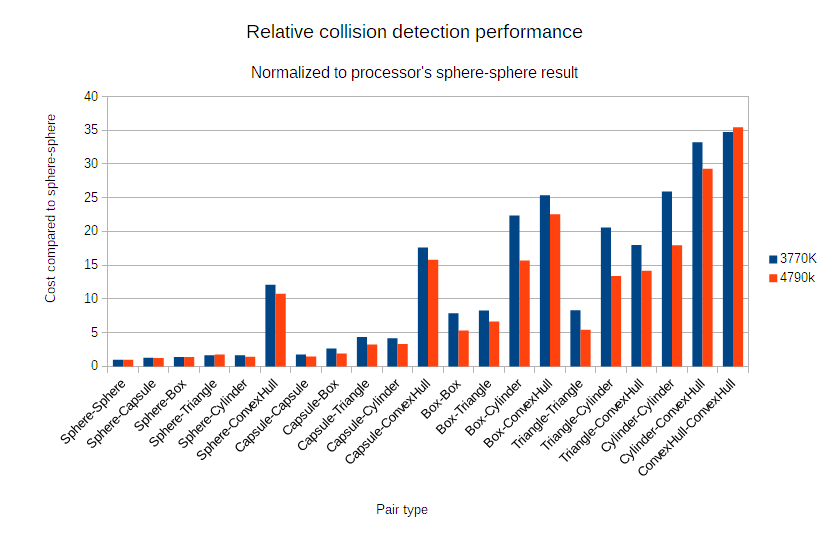
- Mesh colliders are very expensive, especially when meshes collide with each other. It’s better to replace them with spheres, capsules, cubes, and so on. For example, here’s how much it costs to calculate object collision on PC (the results will be even worse for smartphones):
- Don’t overdo it with Rigidbody on a large number of transforms — physics <> transform synchronization can be very demanding.
Let’s say you want a character to die beautifully with ragdoll physics. You have two options. First: the situation when the ragdoll is essentially the character themselves but physics turn on only after death requires a lot performance-wise. The second and correct approach is to take a prefab with ragdoll effects after the character’s death and use it to calculate the fall.
- ParticleSystem — MaxParticles shouldn’t exceed the number of particles. If there are 15 of them in the system, and MaxParticles are set to 10,000, you’re wasting resources.
- Don’t use meshes larger than 30-50 polygons as particles. Getting by with billboards is the ideal scenario.
- Check out Unity’s manual on graphics performance optimization.
- The last tip is to use profilers, since there is no one recipe for all projects and you always need to look at where it lags. Unity has a built-in Frame Debugger, it’s quite good for helping you understand how the rendering is going and if there are any stealth cameras/objects. Sometimes it’s worth checking out Android Studio or Xcode as well. In the extreme cases when you can’t find the root of the problem at all, you can use the ARM profiler.
*****
Part 2: Overviewing the Unity Profiler and areas you shouldn’t get into